

In China the staple starch differs from region to region, but they can be classified into two main groups. These starches are rice (obviously) and wheat. Rice reigns supreme in southern China and is often eaten for all three meals of the day. A typical day might consist of:
Congee and assorted sides for breakfast:

Source: http://soupbelly.com/2009/05/07/congee/
White steamed rice with assorted vegetable and meat dishes for lunch:

Source: http://www.chow.com/recipes/27496-basic-steamed-white-rice
And the exact same steamed rice for dinner plus different sides.
In Northern China, wheat reigns supreme. But the wheat dishes are not baked in an oven. Instead they are steamed and boiled. A typical day might consist of:
Plain steamed buns (these things don't have filling) and assorted sides for breakfast:

Source: http://www.topchinesecuisine.com/category/regional-cuisines/shandong-cuisine/
Noodles for lunch:
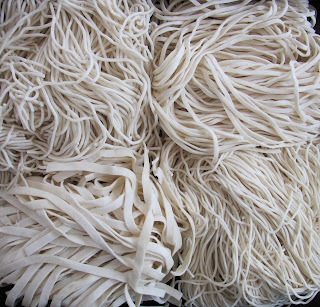
Source: http://www.gingersrealfood.com/2011/03/fresh-chinese-noodles-la-mien.html
And again the exact same for dinner.
Hence baked buns are little out of the norm. But I think this gives them better texture. So here's the recipe.
Ingredients:
- 2 cups warm water
- 1/3 cups brown sugar
- 4 cups all purpose flour or bread flour
- 1/2 tsp salt
- 1 1/2 tsp instant yeast
Method:
- Ensure that the water is just above body temperature by sticking your pinky into it. If the water feels warm and almost hot then it is the correct temperature for activating the yeast.
- Dissolve the sugar in the water before adding the yeast. Stir gently with a spoon and set aside for the yeast to activate.
- In a large mixing bowl add 2 cups of the flour and the salt. Give the mixture a quick whisk to remove any lumps and to distribute the salt. Set aside until the yeast activated.
- After about 1-2 minutes, the yeast mixture should have a layer of froth on top and small bubbles should be rising to the top of the container. This means the yeast is activated. Stir the mixture again to ensure the yeast is evenly distributed in the liquid and pour all of it at once into the flour and salt mixture.
- Use a spatula to mix the wet and the dry into a very wet batter-like mixture. Place the mixing bowl on the stand mixer and attach the dough hook. Knead on low speed and add the rest of the flour 1 cup at a time. Ensure that the previous cup is completely incorporated before adding the next cup.
- Once all the flour is added, continue to knead the dough for 6 minutes or until it is stretchy, soft and slightly sticky.
- The resulting dough will be very soft and moist. To prevent it from sticking to your hand, spray your hands with cooking spray or lightly oil them with canola oil. Lift the dough out and fold it into itself to form a smooth surface on top. Spray the mixing bowl with cooking spray and roll the ball of dough in the oil to coat evenly. Place the ball of dough smooth side up in the bowl and cover the bowl with plastic wrap.
- Put in a warm place to rise for 1 hour or until doubled in size. I put mine in my oven with the oven light on.
- After the dough has risen, punch the dough down and pinch off portions about the size of a ping pong ball. Fold it into itself to form a smooth surface and roll it between your hands to make a ball. Stretch each ball between your fingers to flatten them slightly into a disk and place on a greased baking sheet.
- Lightly oil the top of the buns with cooking spray and let it rise again for 15 minutes or until slightly puffed and plump.
- Bake in a preheated oven for 25 – 30 minutes or until golden brown on the top and the bottom.
- Let them cool for 5 minutes before slicing them almost in half but leaving a small hinge on one end so it’s not completely detached.
Note: If you do not have a stand mixer, add 3 cups of flour to the initial mixture and dump the ball of dough onto a well floured surface before kneading the rest of the flour in by hand. The resulting texture will be the same, it just takes more time and effort. And it's a great work out.
My family loves to eat these buns with my Chinese Braised Pork Belly. The recipe for which can be found in my last blog post here. But these will go great with a beef patty, pulled pork, or falafel maybe? Haha, be creative with it.
